The AEM Groovy Console provides an interface for running Groovy scripts in Adobe Experience Manager. Scripts can be created to manipulate content in the JCR, call OSGi services, or execute arbitrary code using the AEM, Sling, or JCR APIs without any change in the core code of the AEM project.
Introduction:
Apache Groovy is an Object-oriented programming language used for Java platforms like AEM. It is almost like a super version of Java which offers all of Java’s enterprise capabilities. Learning/understanding groovy comes naturally to a java developer so the learning curve to learn groovy for a java developer is very minimal and easy enough. It can manipulate without much hustle, easy, fast, and simple to use provided UI.
Requirements:
- AEM author instance running on localhost:4502
- Maven 3.x
Installation:
There are 2 ways to install Groovy Console
1. Install a groovy console package in AEM through the package
- Download the groovy console package from https://github.com/CID15/aem-groovy-console/tags (For previous versions, tags can be checked out from GitHub )
- Built directly from the source code by running
mvn clean install - Install the package using the CRX package manager
- Verify the installation on http://localhost:4502/apps/groovyconsole.html
Example:
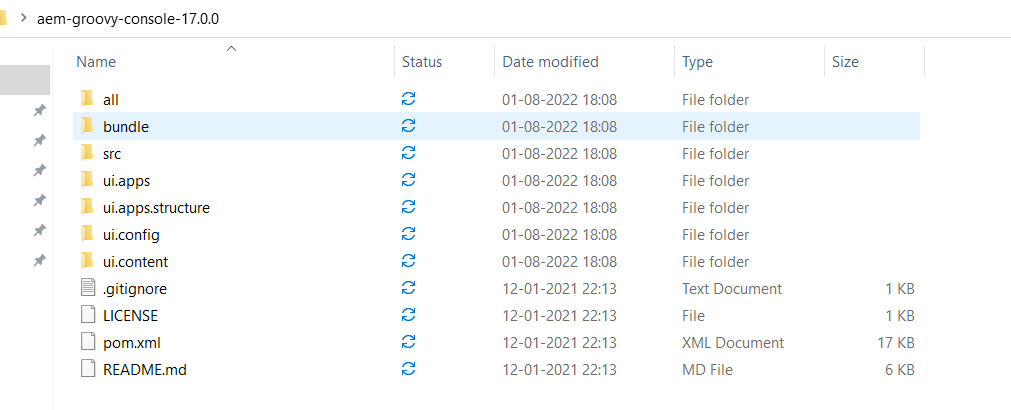
- Suppose you have downloaded the package named “aem-groovy-console-17.0.0.zip” from https://github.com/CID15/aem-groovy-console/tags
- Extract the ZIP file and go to the folder

- OR Go to the folder from the command prompt and execute the below command on the project root folder.
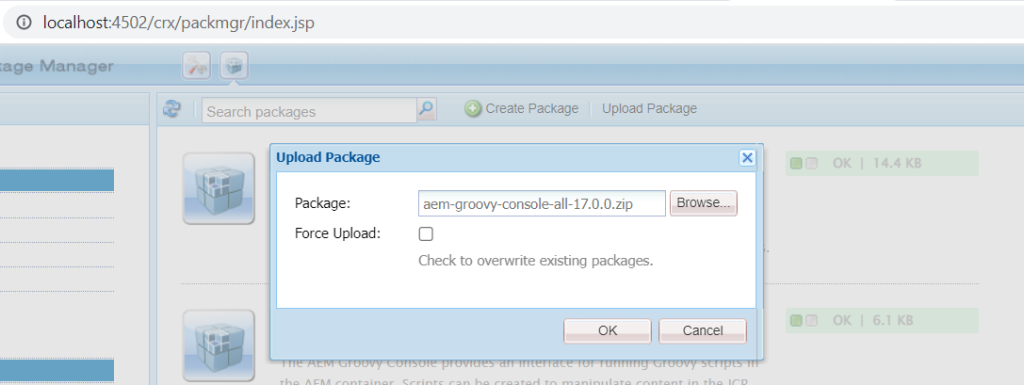
mvn clean install - After that go to http://localhost:4502/crx/packmgr
- Click on “Upload Package” and select the “aem-groovy-console-all-17.0.0.zip” package from
....aem-groovy-console-17.0.0\all\targetfolder


- Install It and verify the installation on http://localhost:4502/apps/groovyconsole.html OR http://localhost:4502/groovyconsole
2. By updating pom.xml
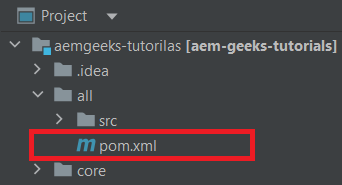
- Update the pom.xml under the “all” folder

- Add embedded under embeddeds
<embedded>
    <groupId>org.cid15.aem.groovy.console</groupId>
    <artifactId>aem-groovy-console-all</artifactId>
    <type>zip</type>
    <target>/apps/gap-cloud-packages/groovyconsole/install</target>
</embedded>
- Add dependency under dependencies (Here 17.0.0 is the version you can update it with the required version)
<dependency>
    <groupId>org.cid15.aem.groovy.console</groupId>
    <artifactId>aem-groovy-console-all</artifactId>
    <version>17.0.0</version>
    <type>zip</type>
</dependency>
- And you are done!
- Build your project and verify the installation on http://localhost:4502/apps/groovyconsole.html
Know about the Groovy GUI:
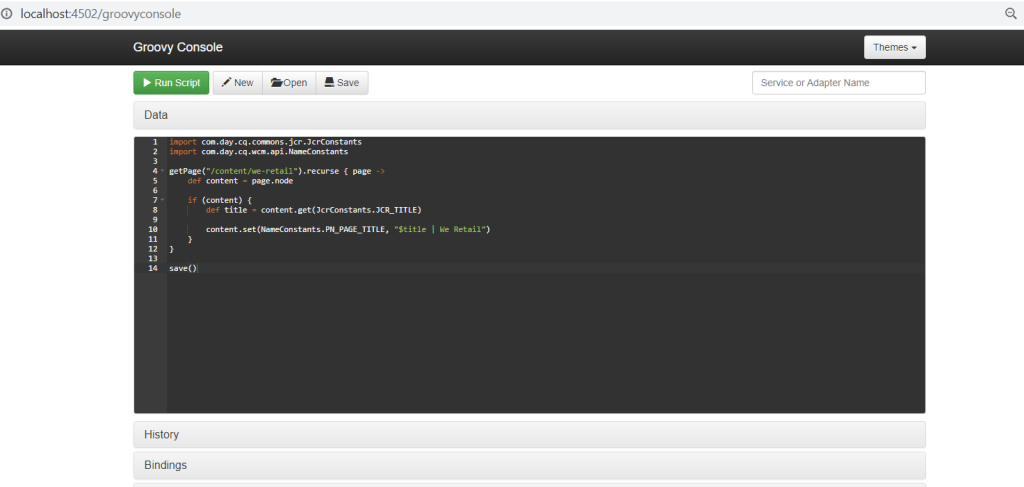
Go to http://localhost:4502/apps/groovyconsole.html and you can see the Groovy GUI like this

- Themes: once can set his preferred theme to style the groovy console and coding area in it. By default, you get to see the one you see in the picture.
- Run Script button: this button executes the currently written code in the coding area.
- New button: this button will clear out the coding area for you to start with a new groovy script.
Be careful to save your current script before pressing this button. - Open button: this will open a box showing all the available saved scripts to load in the current coding area to use. This will also show the sample scripts provided by the groovy console under the samples folder, which you may prefer to know how to perform a few basic operations in AEM using groovy.
Be careful to save your current script before pressing this button. - Save button: this will show a popup box to fill in a filename to save your current script with that filename. If you are editing an existing script, then it will still open this box with the existing script’s filename in it. If you wish to save it in a different file, then change the name and save or else leave the name as is and save.
- Service or adapter name search box: this is the very helpful section where you may start typing the name of any OSGI service or adapter name to look up and this will show you that service or adapter if available. If you choose that service or adapter, then a piece of script/statement would be inserted at the end of your current script which you may cut and place anywhere else as well you get access to the instance of that service or adapter.
- Coding Area: this section just under the Data section is the area where you will write your script.
There are a few more sections in the groovy console. Some of the most important of them all are Bindings, Imports, and Methods. These sections tell you about all the implicit binding objects, imports, and methods available for you to directly use inside your groovy script.
Batch Script Execution:
Saved scripts can be remotely executed by sending a POST request to the console servlet with either the scriptPath or scriptPaths query parameter.
Single Script
curl -d "scriptPath=/var/groovyconsole/scripts/samples/JcrSearch.groovy" -X POST -u admin:admin http://localhost:4502/bin/groovyconsole/post.jsonMultiple Scripts
curl -d "scriptPaths=/var/groovyconsole/scripts/samples/JcrSearch.groovy&scriptPaths=/var/groovyconsole/scripts/samples/FulltextQuery.groovy" -X POST -u admin:admin http://localhost:4502/bin/groovyconsole/post.jsonExamples:
There are a few samples already present in the console.
Go to Open>Scripts>samples
You can select any sample and try executing your first groovy script.

Happy Coding!
AEM Developer
Hi, Have you faced any permission issues while running the scripts on AEM cloud instance?
Yes. You have to be an Admin to run the script.
Hi Sagor, I logined as Admin and getting “no permission to execute the script” everytime. even the service user being used has all administrator permissin. please advise.
Hi Ravi,
Are you trying it on your local?